Project Overview :
● A self-driving vehicle, also known as an autonomous vehicle or rover, is a vehicle that is capable of traveling without human input.
● The vehicle will drive itself based on the Sign which it detects using web camera.
● The traffic sign detection is perform using the AI model which trained using the traffic sign images. Here is the link, how training traffic sign model.
TRAFFIC-(SIGN DETECTION) :
Click Here for traffic sign detection projects.
Requirements :
● Jetson Nano development kit.
● L298N Motor Driver Module.
● LM2596 DC-DC Buck Converter Step Down Module.
● DC Motors and chassis.
● Battery .
● Web camera.
Initial setup for :
📚 Click Here , for the initial setup
Here is the image of rover,
Circuit connection :

CONNECTION TABLE :
| RPI | I/O | Components |
|---|---|---|
| 5V | OUT + | Buck converter |
| GND | OUT - | Buck converter |
| BATTERY | 12V | L298N H Bridge |
| GND | GND | L298N H Bridge |
| GPIO33 | ENA | L298N H Bridge |
| GPIO22 | IN1 | L298N H Bridge |
| GPIO23 | IN2 | L298N H Bridge |
| GPIO24 | IN3 | L298N H Bridge |
| GPIO25 | IN4 | L298N H Bridge |
| GPIO34 | ENB | L298N H Bridge |
SPECIFICATION :
Jetson Nano development kit :

● NVIDIA Jetson Nano is an embedded system-on-module (SoM) and developer kit from the NVIDIA Jetson family, including an integrated 128-core Maxwell GPU, quad-core ARM A57 64-bit CPU, 4GB LPDDR4 memory, along with support for MIPI CSI-2 and PCIe Gen2 high-speed I/O.
● There is also the Jetson Nano 2GB Developer Kit with 2GB memory and the same processing specs.
● Useful for deploying computer vision and deep learning, Jetson Nano runs Linux and provides 472 GFLOPS of FP16 compute performance with 5-10W of power consumption.
L298N Motor Driver Module :
● The L298N Motor Driver module consists of an L298 Motor Driver IC, 78M05 Voltage Regulator, resistors, capacitor, Power LED, 5V jumper in an integrated circuit.
● When the power supply is less than or equal to 12V, then the internal circuitry will be powered by the voltage regulator and the 5V pin can be used as an output pin to power the microcontroller.
● The jumper should not be placed when the power supply is greater than 12V and separate 5V should be given through 5V terminal to power the internal circuitry.
● ENA & ENB pins are speed control pins for Motor A and Motor B while IN1& IN2 and IN3 & IN4 are direction control pins for Motor 1 and Motor 2.

● Driver Model: L298N 2A .
● Driver Chip: Double H Bridge L298N.
● Motor Supply Voltage (Maximum): 46V.
● Motor Supply Current (Maximum): 2A.
● Logic Voltage: 5V.
● Driver Voltage: 5-35V.
● Driver Current:2A.
● Logical Current:0-36mA.
● Maximum Power (W): 25W.
● Current Sense for each motor.
● Heatsink for better performance.
● Power-On LED indicator.
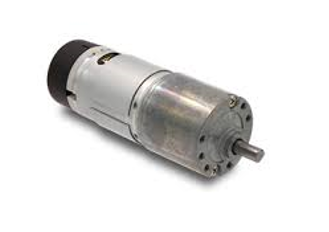
DC motor :
● A DC motor is any motor within a class of electrical machines whereby direct current electrical power is converted into mechanical power.
● High torque is the biggest advantage of using DC motors in robotics.
● The direction of current flow in part of the motor is changed periodically.
● The speed of a DC motor is controlled using a variable supply voltage or by changing the strength of the current within its field wind rings.
● While smaller DC motors are commonly used in the making of appliances, tools, toys, and automobile mechanisms, such as electric car seats, larger DC motors are used in hoists, elevators, and electric vehicles.
LM2596 DC-DC Buck Converter Step Down Module
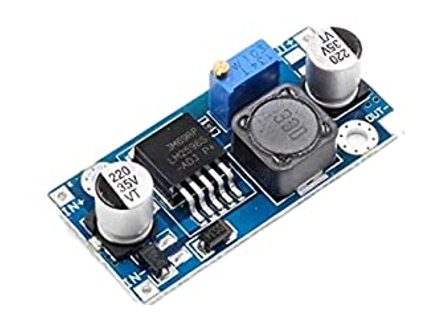
● Input: DC 3V to 40V (input voltage must be higher than the output voltage to 1.5v above cannot boost)
● Output: DC 1.5V to 35V voltage continuously adjustable, high-efficiency maximum output current of 3A
● Features: All Sanyo solid capacitors, the 36u thickening circuit boards, high-Q inductance with output value of high-power LED indicator.
Code :
● We have to include the location of AI model which we have trained in code. The trained model link :👉🏻 traff_rpi7.h5
 import numpy as np
import cv2
from tensorflow import keras
import Jetson.GPIO as GPIO
from time import sleep

m1=22
m2=23
m3=24
m4=26
pwm1=32
speed=70
count =0
GPIO.setmode(GPIO.BOARD)
GPIO.setup(m1,GPIO.OUT)
GPIO.setup(m2,GPIO.OUT)
GPIO.setup(m3,GPIO.OUT)
GPIO.setup(m4,GPIO.OUT)
GPIO.setup(pwm1,GPIO.OUT)
p=GPIO.PWM(pwm1,1000)
p.start(speed-6.5)

def f():
    GPIO.output(m1,GPIO.HIGH)
    GPIO.output(m2,GPIO.LOW)
    GPIO.output(m3,GPIO.HIGH)
    GPIO.output(m4,GPIO.LOW)
    count=0
def b():
    GPIO.output(m2,GPIO.HIGH)
    GPIO.output(m1,GPIO.LOW)
    GPIO.output(m4,GPIO.HIGH)
    GPIO.output(m3,GPIO.LOW)
def l():
    GPIO.output(m1,GPIO.LOW)
    GPIO.output(m2,GPIO.HIGH)
    GPIO.output(m3,GPIO.HIGH)
    GPIO.output(m4,GPIO.LOW)
    count=1
def r():
    GPIO.output(m1,GPIO.HIGH)
    GPIO.output(m2,GPIO.LOW)
    GPIO.output(m3,GPIO.LOW)
    GPIO.output(m4,GPIO.HIGH)
    count=1
def s():
    GPIO.output(m2,GPIO.LOW)
    GPIO.output(m1,GPIO.LOW)
    GPIO.output(m4,GPIO.LOW)
    GPIO.output(m3,GPIO.LOW)
    count=0
f()
threshold = 0.97  #
font = cv2.FONT_HERSHEY_SIMPLEX
model = keras.models.load_model(r'/home/covailab/Desktop/kt_rover/traff_rpi7.h5')


def preprocess_img(imgBGR, erode_dilate=True):
    rows, cols, _ = imgBGR.shape
    imgHSV = cv2.cvtColor(imgBGR, cv2.COLOR_BGR2HSV)
    Bmin = np.array([100, 43, 46])
    Bmax = np.array([124, 255, 255])
    img_Bbin = cv2.inRange(imgHSV, Bmin, Bmax)

    Rmin1 = np.array([0, 43, 46])
    Rmax1 = np.array([10, 255, 255])
    img_Rbin1 = cv2.inRange(imgHSV, Rmin1, Rmax1)

    Rmin2 = np.array([156, 43, 46])
    Rmax2 = np.array([180, 255, 255])
    img_Rbin2 = cv2.inRange(imgHSV, Rmin2, Rmax2)
    img_Rbin = np.maximum(img_Rbin1, img_Rbin2)
    img_bin = np.maximum(img_Bbin, img_Rbin)

    if erode_dilate is True:
        kernelErosion = np.ones((3, 3), np.uint8)
        kernelDilation = np.ones((3, 3), np.uint8)
        img_bin = cv2.erode(img_bin, kernelErosion, iterations=2)
        img_bin = cv2.dilate(img_bin, kernelDilation, iterations=2)
    return img_bin


def contour_detect(img_bin, min_area, max_area=-1, wh_ratio=1.2):
    rects = []
    _, contours, _ = cv2.findContours(img_bin.copy(), cv2.RETR_EXTERNAL, cv2.CHAIN_APPROX_NONE)
    if len(contours) == 0:
        return rects

    max_area = img_bin.shape[0] * img_bin.shape[1] if max_area < 0 else max_area
    for contour in contours:
        area = cv2.contourArea(contour)
        if area >= min_area and area <= max_area:
            x, y, w, h = cv2.boundingRect(contour)
            if(1.0 * w / h < wh_ratio and 1.0 * h / w < wh_ratio):
                rects.append([x, y, w, h])
    return rects


def preprocessing(img):
    img = cv2.cvtColor(img, cv2.COLOR_BGR2GRAY)
    img = cv2.equalizeHist(img)
    img = img / 255
    return img


def class_disp(classNo):
    sign_classes=['Right','Speed Limit 20 km/h','Stop','Straight','Left']
    classNo=int(classNo)
    return sign_classes[classNo]

if __name__ == "__main__":
    cap = cv2.VideoCapture(0)
    cols = int(cap.get(cv2.CAP_PROP_FRAME_WIDTH))
    rows = int(cap.get(cv2.CAP_PROP_FRAME_HEIGHT))

    while (1):
        ret, img = cap.read()
        img_bin = preprocess_img(img, False)
        #cv2.imshow("bin image", img_bin)
        min_area = img_bin.shape[0] * img.shape[1] / (25 * 4)
        rects = contour_detect(img_bin, min_area=min_area)
        img_bbx = img.copy()
        for rect in rects:
            xc = int(rect[0] + rect[2] / 2)
            yc = int(rect[1] + rect[3] / 2)

            size = max(rect[2], rect[3])
            x1 = max(0, int(xc - size / 2))
            y1 = max(0, int(yc - size / 2))
            x2 = min(cols, int(xc + size / 2))
            y2 = min(rows, int(yc + size / 2))

            if rect[2] > 100 and rect[3] > 100:
                continue
                #cv2.rectangle(img_bbx, (rect[0], rect[1]), (rect[0] + rect[2], rect[1] + rect[3]), (0, 0, 255), 2)
            crop_img = np.asarray(img[y1:y2, x1:x2])
            crop_img = cv2.resize(crop_img, (32, 32))
            crop_img = preprocessing(crop_img)
            cv2.imshow("afterprocessing", crop_img)
            crop_img = crop_img.reshape(1, 32, 32, 1)
            predictions = model.predict(crop_img)
            classIndex=np.argmax(predictions, axis=-1)
            probabilityValue = np.amax(predictions)
            if probabilityValue > threshold:
                cv2.putText(img_bbx, str(classIndex) + " " + str(class_disp(classIndex)), (rect[0], rect[1] - 10),
                            font, 0.75, (0, 0, 255), 2, cv2.LINE_AA)
                cv2.putText(img_bbx, str(round(probabilityValue * 100, 2)) + "%", (rect[0], rect[1] - 40), font, 0.75,
                            (0, 0, 255), 2, cv2.LINE_AA)
                print(class_disp(classIndex))
                if (class_disp(classIndex) =='Straight'):
                    f()
                    #sleep(1)
                elif(class_disp(classIndex) =='Stop'):
                    s()
                elif((class_disp(classIndex) =='Right') ):
                    s()
                    sleep(0.50)
                    l()
                    sleep(1)
                    f()
                    count=1
                elif((class_disp(classIndex) =='Left') ):
                    s()
                    sleep(0.50)
                    r()
                    sleep(1)
                    f()
                    count=1
                print(probabilityValue)
        cv2.imshow("Final result", img_bbx)

        if cv2.waitKey(1) & 0xFF == ord('q'):
            break

cap.release()
s()
cv2.destroyAllWindows()
OUTPUT :